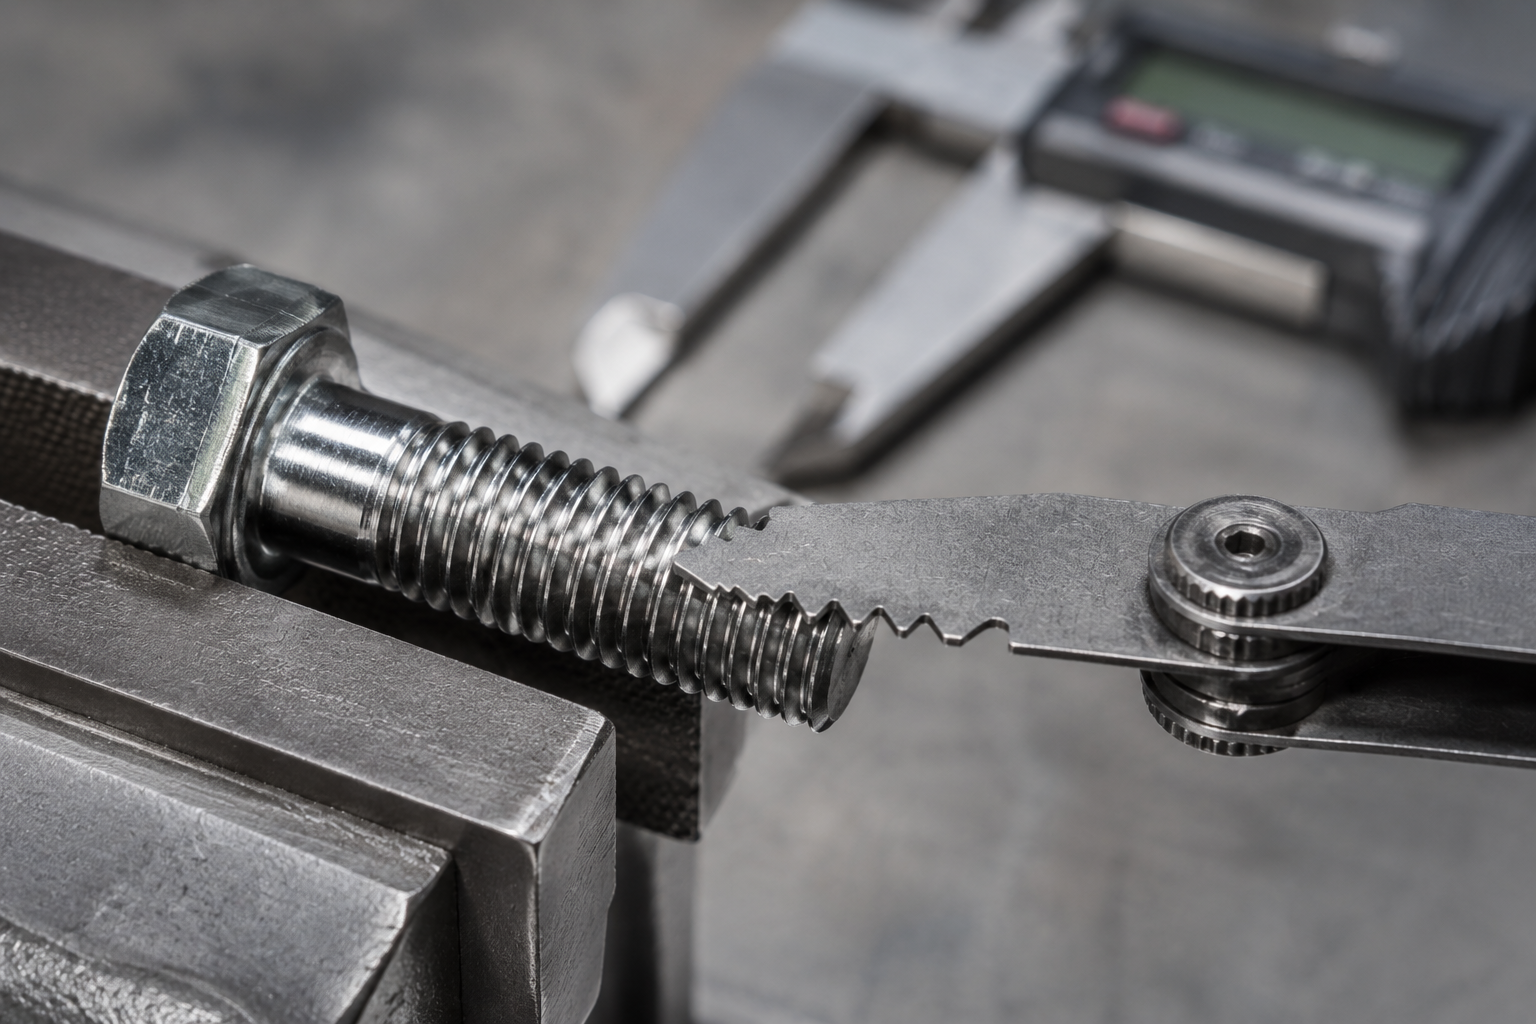
Metric Thread Pitch Gauge: How to Measure Metric Fasteners
Metric fasteners dominate modern engineering. From the engine in your car to the frame of a CNC machine, the bolts holding an agricultural implement together, or the fittings on a European appliance — the overwhelming majority of threaded hardware manufactured in the last 50 years follows the ISO metric thread standard. And yet metric thread pitch remains one of the most commonly misidentified fastener specifications, because two bolts that look identical can carry completely different pitch values that make them mechanically incompatible.
A metric thread pitch gauge eliminates that ambiguity. It is a simple, inexpensive tool that physically matches blade profiles to thread crests and gives you an unambiguous identification in seconds. This guide explains exactly how metric thread pitch works, how to measure it correctly, and how to read and use your results — whether you're sourcing a replacement fastener, specifying a tap, or writing an engineering callout.
🏠 Looking for a roof pitch gauge instead?
If you searched for "pitch gauge" to measure a roof slope rather than a screw thread, our free digital tool measures any roof pitch instantly using your phone — no hardware needed.
What Is Metric Thread Pitch?
In the ISO metric thread system, pitch is defined as the axial distance between adjacent thread crests — measured in millimetres. A bolt designated M10 x 1.5 has a nominal diameter of 10mm and a thread pitch of 1.5mm: each complete thread revolution advances the fastener 1.5mm along its axis.
This is distinct from the imperial (Unified Thread Standard) approach, which expresses pitch as threads per inch (TPI). The two systems are fundamentally incompatible — metric pitch in millimetres and imperial pitch in TPI cannot be converted into each other without changing the physical thread profile, and no metric fastener can be safely used in an imperial tapped hole or vice versa.
The metric thread pitch formula:
Pitch (mm) = Lead (mm) ÷ Number of thread starts
For standard single-start fastener threads (the vast majority): Pitch = Lead
In plain terms: pitch is simply the gap between one thread crest and the next, measured parallel to the bolt's axis. A 1.0mm pitch means the crests are 1.0mm apart. A 2.0mm pitch means they are 2.0mm apart — a coarser, more widely spaced thread.
The ISO Metric Thread Series: Coarse, Fine, and Extra Fine
For any given metric bolt diameter, multiple pitch options exist. The ISO standard defines three series:
- Coarse thread (standard) — the default series for general-purpose fasteners. If a pitch isn't specified on a metric bolt, it is almost certainly coarse. Designated simply as "M10" rather than "M10 x 1.5" in most catalogues.
- Fine thread — a smaller pitch value (more threads per unit length) for applications requiring finer adjustment, greater resistance to vibration loosening, or higher preload in a given torque. Common in automotive and precision machinery.
- Extra fine thread — the tightest pitch for a given diameter. Used in thin-walled components, instrument applications, and situations where a fine thread is specified but the engagement length is very short.
The critical point: coarse and fine threads of the same diameter are not interchangeable. An M10 x 1.5 bolt forced into an M10 x 1.25 hole will cross-thread and potentially strip the hole — a mistake that is both easy to make and expensive to fix. A metric thread pitch gauge removes all guesswork.
Complete Metric Thread Pitch Reference Table
The table below covers every standard metric thread from M1.6 to M36 — the full range you'll encounter in practical engineering and maintenance work — with coarse, fine, and extra fine pitch values where they exist.
| Diameter | Coarse pitch (mm) | Fine pitch (mm) | Extra fine (mm) | Typical application |
|---|---|---|---|---|
| M1.6 | 0.35 | 0.2 | — | Miniature instruments, watches |
| M2 | 0.4 | 0.25 | — | Electronics, PCB standoffs |
| M2.5 | 0.45 | 0.35 | — | Consumer electronics, optical equipment |
| M3 | 0.5 | 0.35 | — | Electronics, small instruments, 3D printers |
| M4 | 0.7 | 0.5 | — | Light machinery, bicycle components |
| M5 | 0.8 | 0.5 | — | General machinery, panels, fixtures |
| M6 | 1.0 | 0.75 | — | General machinery, bike, appliances |
| M8 | 1.25 | 1.0 | — | Engine components, general assemblies |
| M10 | 1.5 | 1.25 | 1.0 | Automotive, structural connections |
| M12 | 1.75 | 1.5 | 1.25 | Suspension, gearboxes, heavy machinery |
| M14 | 2.0 | 1.5 | — | Wheel bolts, driveshafts |
| M16 | 2.0 | 1.5 | — | Structural bolts, large equipment |
| M18 | 2.5 | 1.5 | — | Heavy industrial, agricultural |
| M20 | 2.5 | 1.5 | — | Heavy structural, flanges |
| M22 | 2.5 | 1.5 | — | Automotive axles, heavy equipment |
| M24 | 3.0 | 2.0 | — | Civil engineering, crane components |
| M27 | 3.0 | 2.0 | — | Heavy structural, mining |
| M30 | 3.5 | 2.0 | — | Heavy structural, pressure vessels |
| M36 | 4.0 | 3.0 | — | Bridge bolts, heavy civil construction |
💡 Default rule: When a metric fastener's pitch is not specified — in a parts catalogue, on a drawing, or in a conversation — always assume coarse pitch. If you need a fine or extra fine thread, it will always be explicitly stated. An M12 bolt with no pitch callout is M12 x 1.75. An "M12 fine" is M12 x 1.5.
Types of Metric Thread Pitch Gauge
Leaf-type metric pitch gauge
The standard metric thread pitch gauge is a folding set of thin hardened steel blades, each ground to a precise ISO metric thread profile and stamped with its pitch value in millimetres. Blade counts typically range from 17 to 30 for metric-only sets, covering the most common pitches from 0.35mm to 3.5mm. To use one, fan out the blades, find the one whose teeth match the thread crests with zero gap or play, and read the value.
Leaf-type gauges are the default choice for almost every practical application: they are inexpensive ($8–$20 for a quality set), require no calibration, need no batteries, and last indefinitely with normal workshop care. A dedicated metric set will carry more fine pitch values — including 0.35mm, 0.45mm, and 0.75mm — than a combination metric/imperial set, which is important when working with small-diameter precision fasteners.
Combination metric + imperial gauge
If your workshop handles both metric and imperial equipment, a combination gauge set covers both standards in a single tool, usually with metric blades on one side and imperial blades on the other. The trade-off is that combination sets sometimes omit the rarest metric pitches (particularly below 0.5mm) to keep the blade count manageable. For most automotive, agricultural, and general mechanical work this is not a practical limitation.
Optical and digital thread gauges
For laboratory, metrology, or production quality control environments, digital thread pitch measurement tools — including optical comparators and thread pitch micrometers — provide pitch readings with sub-micrometre precision and traceable calibration. These are far beyond what most workshops need for identification tasks, but they are the correct tool when you need a certified pitch measurement for a quality record or dispute resolution.
How to Measure Metric Thread Pitch: Step by Step
What you need
- A metric thread pitch gauge (leaf-type)
- A digital calliper (for diameter measurement)
- A wire brush or thread chaser (to clean the fastener)
- Good lighting — a head torch or bench lamp is helpful for internal threads
Step 1: Confirm the fastener is metric
Before gauging, confirm you're dealing with a metric fastener. Check the bolt head for property class markings: metric bolts carry numbers (8.8, 10.9, 12.9) on the head face; metric nuts carry a number or dot pattern. Measure the shank diameter with callipers — metric bolts come in even millimetre nominal diameters (6mm, 8mm, 10mm, 12mm). Imperial bolts come in fractional inch sizes (1/4", 3/8", 1/2") which, when converted, produce non-round metric equivalents (6.35mm, 9.52mm, 12.7mm). A diameter of exactly 10.0mm is almost certainly metric M10. A diameter of 9.5mm is almost certainly imperial 3/8".
⚠️ The M10 vs 3/8" trap: M10 (nominal 10mm, actual thread crests ~9.85mm) and 3/8" (nominal 9.525mm) are visually similar and will each feel loose in the other's tapped hole — neither will thread in properly, but the similarity is enough to cause a costly mistake without measurement. Always calliper first.
Step 2: Clean the thread thoroughly
Wire-brush the thread to remove all surface contamination — oil, rust, paint, thread locker, and machining burrs. A thread chaser (a hardened tool that follows the existing thread form) is ideal for cleaning damaged or corroded threads before gauging. Any debris between the gauge blade and thread crests will prevent a flush fit and may cause you to accept the wrong pitch as a match.
Step 3: Estimate the pitch series visually
Look at the thread with the naked eye and make a rough assessment before reaching for the gauge. Use this as your starting point:
| Visual appearance | Likely pitch range | Start gauging from |
|---|---|---|
| Very fine, closely packed threads | 0.35mm – 0.75mm | 0.5mm blade |
| Fine, moderately tight threads | 0.75mm – 1.25mm | 1.0mm blade |
| Standard, clearly visible threads | 1.25mm – 1.75mm | 1.5mm blade |
| Coarse, widely spaced threads | 2.0mm – 3.5mm | 2.5mm blade |
Step 4: Press the blade against the thread
Hold the selected blade parallel to the fastener axis — not perpendicular to it. Press the toothed edge of the blade firmly against the thread crests and try to engage at least 5 to 6 complete thread pitches. More engagement length gives a more reliable reading. Rock the blade very gently across its length: a correct match has zero lateral play and zero visible gap anywhere along the contact zone.
Step 5: Check the fit at the right angle
After pressing the blade flat, look at the contact zone from the side at a low, grazing angle. Hold it up to a light source if possible. Any light showing between blade teeth and thread crests — even a hairline gap — means this is not the correct pitch. Move to an adjacent blade value and try again. The difference between 1.25mm and 1.5mm blades is subtle visually but unmistakable once you put them back-to-back on the same thread.
💡 The light test: The most reliable confirmation technique is to hold the engaged gauge blade up to a window or bench lamp so the light source is behind the thread. A correct match shows a dark, solid contact line. Any incorrect pitch will show a characteristic alternating pattern of light and dark gaps along the blade length — visible immediately.
Step 6: Read and record the full thread designation
The matching blade is stamped with its pitch value in mm. Combined with the diameter from your calliper reading, you now have the complete ISO metric thread designation:
Full metric thread designation = M[Diameter] x [Pitch]
Examples:
Calliper: 9.85mm diameter + gauge blade: 1.5mm → M10 x 1.5
Calliper: 11.9mm diameter + gauge blade: 1.75mm → M12 x 1.75
Calliper: 7.9mm diameter + gauge blade: 1.25mm → M8 x 1.25
This designation is all you need to order a replacement fastener, specify a tap or die, or write an engineering drawing callout. Coarse-pitch designations are often written in abbreviated form — M10 rather than M10 x 1.5 — in catalogues and drawings where coarse is the default assumption.
Common Measurement Mistakes and How to Avoid Them
Mistake 1: Gauging a dirty thread
Even a thin film of rust or hardened thread locker is enough to prevent a blade from seating correctly. Clean first, gauge second — every time. A thread that looks clean to the naked eye may still have enough surface contamination in the thread valleys to shift a blade reading by half a millimetre.
Mistake 2: Accepting a near-fit
The most common identification error is accepting a blade that "almost fits" rather than continuing to search for the blade that fits perfectly. Adjacent metric pitches — 1.25mm vs 1.5mm, or 1.75mm vs 2.0mm — look deceptively similar when the blade is only partially engaged. Always test on a minimum of 5 thread crests and use the light test to confirm before recording your reading.
Mistake 3: Gauging at the damaged end of the thread
The chamfered lead-in end of a bolt thread is intentionally truncated and will never give a reliable gauge reading. Always position the blade at least 3–4 thread pitches in from the end of the fastener, on the full-form thread section.
Mistake 4: Confusing pitch and diameter units
Metric pitch and metric diameter both use millimetres, which occasionally causes confusion. Remember: diameter is the outer width of the bolt shank (measured with callipers across the thread crests); pitch is the axial spacing between thread crests (measured with the gauge blade along the thread axis). They are independent of each other.
Mistake 5: Assuming coarse without checking
In high-vibration environments — automotive, agricultural, aerospace — fine-pitch threads are common precisely because they resist loosening better. Never assume coarse pitch on an engine or suspension component. Always gauge, even on fasteners that look "standard."
⚠️ Critical applications: For wheel nuts, suspension bolts, engine head studs, and brake caliper bolts, incorrect pitch identification can result in undertorqued or cross-threaded fasteners in life-safety components. In these applications, always verify pitch with a gauge and confirm the full designation against the manufacturer's specification before installation.
Metric Thread Pitch and Tap/Die Selection
One of the most important uses of metric thread pitch measurement is selecting the correct tap or die for repair or new threading operations. A tap cuts internal threads (inside a hole); a die cuts external threads (on a rod or bolt shank). Both must exactly match the pitch of the thread you are creating or repairing.
If you are repairing a stripped M10 thread, for example, you must first determine whether the original thread was M10 x 1.5 (coarse) or M10 x 1.25 (fine) — because using the wrong tap will either cut an entirely new thread at a different pitch, or cut into the wrong part of the damaged thread and worsen the damage. Gauge the remaining intact thread — or a matching bolt from the same assembly — before selecting your tap.
| Thread designation | Tap drill size (mm) | Clearance drill size (mm) |
|---|---|---|
| M3 x 0.5 | 2.5 | 3.2 |
| M4 x 0.7 | 3.3 | 4.3 |
| M5 x 0.8 | 4.2 | 5.3 |
| M6 x 1.0 | 5.0 | 6.4 |
| M8 x 1.25 | 6.8 | 8.4 |
| M10 x 1.5 | 8.5 | 10.5 |
| M10 x 1.25 (fine) | 8.75 | 10.5 |
| M12 x 1.75 | 10.2 | 12.5 |
| M12 x 1.5 (fine) | 10.5 | 12.5 |
| M16 x 2.0 | 14.0 | 16.5 |
Choosing a Metric Thread Pitch Gauge: What to Look For
- Pitch range coverage — confirm the set includes the specific pitches you need. Verify that fine pitches below 0.75mm are included if you work with small-diameter or precision fasteners (M3 and below). Not all sets cover 0.35mm and 0.45mm.
- Hardened steel blades — blade teeth must be harder than the fasteners being gauged. Soft blades wear quickly and become inaccurate. Look for blades described as hardened or heat-treated tool steel.
- Legible stampings — pitch values should be deeply stamped, not printed or laser-etched. Stampings must remain readable after extended workshop use and exposure to cutting fluids.
- Smooth pivot — blades should fold in and out without stiffness or binding. A stiff pivot encourages selecting the wrong blade to avoid the effort of unfolding the correct one.
- Protective holder — loose blades in a toolbox get bent, contaminated, and mixed up. A folding body or pouch that keeps blades protected and organised is worth the marginal extra cost.
💡 Buying tip: For professional workshop use, a dedicated metric leaf gauge from an established metrology brand (Mitutoyo, Starrett, Fowler) costs $15–$25 and will outlast years of daily use. For occasional DIY or maintenance tasks, a mid-range combination set from a general tool supplier is perfectly adequate. Avoid the cheapest sets — thin, soft blades that bend on the first use make identification worse rather than better.
🏠 Working on a roof project instead?
The free Roof Pitch Gauge measures any roof slope instantly using your phone's sensors. No ladder, no hardware, no sign-up needed.
Frequently Asked Questions
What is metric thread pitch and how is it measured?
Metric thread pitch is the axial distance between adjacent thread crests, expressed in millimetres. It is measured using a leaf-type thread pitch gauge: press each blade against the cleaned thread until you find the one that fits flush with no gaps, then read the stamped pitch value in mm. Combined with the bolt's diameter measured with callipers, this gives the full ISO designation — for example, M10 x 1.5 means a 10mm diameter bolt with 1.5mm thread pitch.
What is the difference between M10 x 1.5 and M10 x 1.25?
Both are M10 (10mm diameter) metric bolts, but with different thread pitches. The x 1.5 variant has coarse threads — 1.5mm between crests — and is the standard general-purpose M10 bolt. The x 1.25 variant has fine threads — 1.25mm between crests — and is used in applications requiring finer adjustment, better vibration resistance, or higher preload precision, such as automotive engine and suspension components. The two are not interchangeable. A metric thread pitch gauge distinguishes them immediately and unambiguously.
How do I tell if a metric thread is coarse or fine without a gauge?
Visual estimation is possible but unreliable. Coarse threads look more prominent and widely spaced; fine threads appear tighter and more closely packed. A rough rule: if you can clearly count individual threads along a 10mm length of bolt, you're likely looking at coarse pitch for that diameter. However, the difference between coarse and fine on an M10 or M12 bolt (0.25–0.5mm) is too subtle for confident identification by eye. A metric thread pitch gauge gives you a definitive answer in seconds and costs under $20 — the only reliable method.
Can I use a metric thread pitch gauge on stainless steel or aluminium fasteners?
Yes — the gauge blade presses against the fastener thread; it does not cut or mark the material. A metric pitch gauge works equally well on carbon steel, stainless steel, aluminium, titanium, and brass fasteners. The only consideration for softer materials like aluminium is that worn or poorly supported threads may compress slightly under blade pressure, making the fit ambiguous. Use light pressure and the light-gap test rather than forcing the blade tight on soft metals.
What metric thread pitch gauge do I need for automotive work?
For automotive work, a combination metric/imperial leaf gauge set covering metric pitches from 0.5mm to 3.0mm and imperial pitches from 8 TPI to 40 TPI will handle the vast majority of fasteners you encounter. Most modern vehicles are metric throughout — pitches of 1.0mm, 1.25mm, 1.5mm, and 1.75mm cover the majority of engine, suspension, and body fasteners. If you work on older British or American vehicles, the imperial blades become essential too. A combination set in the $15–$25 range from a reputable tool brand is the practical choice.
What is the most common metric thread pitch?
For general-purpose fasteners, the most commonly encountered metric pitches are 1.0mm (M6 coarse), 1.25mm (M8 coarse), 1.5mm (M10 coarse), and 1.75mm (M12 coarse). In automotive and precision assembly work, fine pitches of 1.0mm (M8 fine, M10 extra fine), 1.25mm (M10 fine), and 1.5mm (M12 fine, M14 fine, M16 fine) are equally common. The pitch of 1.5mm appears on both M10 coarse and M12/M14/M16 fine threads — one of the most frequent sources of misidentification, and exactly the scenario a metric thread pitch gauge resolves in seconds.